Have you set to shop
for your initial skilled camera would like to create a reputation for yourself
as a photographer? Or even you simply wish to find out the way to edit photos
for your own albums? With these eight straightforward image editing tips for
gorgeous photography, you'll be able to take your photo work to future level.
When it involves
post-processing, Lightroom, Adobe Camera Raw, and Photoshop are skilled
photographers’ favorites. That’s why I’ve set to supply a number of helpful
tips about these most well liked photo editing programs. So, while not further
ado, let’s begin our list of image editing tips which will upgrade your superb
shots.
1. Speeding simple
PROCESSES
Without a doubt, one
among the most problems regarding icon piece of writing is that the work flow. Typically
having to edit even simply one or two of photos will grow to be hour-long
efforts. the method of gap, editing, and saving will become a pain.
Lightroom and Adobe
Camera Raw simplified this method by utilizing a series of crosscut keys. By pressing
the ‘Cmd+C’ or ‘Ctrl+Shift+C’ (for Copy options) and ‘Cmd+V’ or Ctrl+Shift+V’
(for Paste settings) commands, Lightroom’s computer code helps to avoid wasting
plenty of your time for such remedial tasks.
2. CAMERA RAW FILTER
Photoshop CC has the
choice of facultative the Camera Raw interface. In and of itself quick layer
piece of writing is wiped out Photoshop. Merely choose the layer, then attend
Filter > Camera Raw Filter.


In order to come to
the Camera Raw Filter at any time to fine-tune the photos, initial convert the
layer to a sensible Object victimization Filter > Convert for sensible
Filters. This may stop harmful edits.
3. Find out about
CAMERA AND LENS changes
It’s best to start
with learning a number of ACR and Lightroom’s panels before partaking in Basic
changes. as an example, before you create any substantial changes to paint and
distinction, check the Camera standardization panel.
The Lens Corrections
tab and therefore the change Lens Profile Corrections possibility square
measure price looking for. Particularly if you utilize camera lens lenses, the
automated lens changes would possibly push some areas of the image out of the
frame. It’s a decent plan to ascertain these before cropping the image.
4. Build USE of varied
SHORTCUTS
I merely cannot stress
this enough. Not solely will it prevent time, however it conjointly offers an
improved command of the computer code.
One of the foremost
used tools, the zooming is simplified by pressing and holding H. In Photoshop
this may produce an immediate zoom. You’ll be able to conjointly hold the key
to briefly switch to the tool, dragging the image around to verify details in
alternative areas.
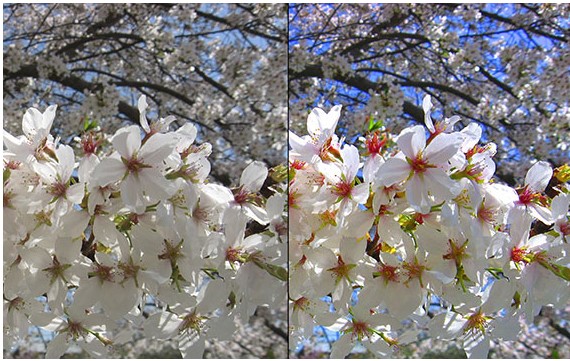
5. Produce a lot of
VIVID SKIES
By utilizing the HSL
possibility in Adobe Camera Raw or Lightroom you'll be able to provides a
delicate boost in distinction between a wild blue yonder and a cloudy one. To
do so, choose physical property and so drag the Blue slider to the left to darken
the sky. Don’t over use it, however, or the sides of the clouds and alternative
objects would possibly step in the sky.


You could use numerous
alternative techniques like applying a digital Graduated Filter, boosting the
Clarity or Curves or increase the Vibrancy or Saturation. Another helpful
possibility is that the Targeted Adjustment Tool, which may be used directly on
the image. Merely choose it from the ACR toolbar or by clicking on the
‘bullseye’ photo at the highest of the HCL panel in Lightroom. Afterward merely
click and drag on dark areas.
6. STYLIZING PHOTOS
If you want to use a lot
of fashionable look to your images the subsequent steps would possibly prove
helpful.
1.Begin by uploading
your image in Photoshop and choose the Brightness/Contrast panel.
2.Regulate Brightness
to +25 and distinction to +35. Set Saturation to -25.
3. Then regulate the
Curves layer.
4. You'll be able to initial choose Red.
choose and drag down a trifle the middle of the line.
5. Then move the Blue line upward.
6. Finally choose and move up a trifle the
green bar.
7. End by choosing the Soft light-weight
mixing mode.
To complete, we have a
tendency to simply have to be compelled to add 2 Solid Color adjustment layers.
choose a yellowness color and so set its mixing mode to Overlay. Set Opacity to
thirty fifth. For the second color layer you'll be able to kind ‘f000ff’. Choose
Screen as its mixing mode and Opacity to half-hour.
7. EXPERIMENT WITH planned SETTINGS
The Presets Panel is found on the left of the interface when you click on the Develop Module. The color presets found there square measure wonderful for experimenting. If you discover yourself during a pinch and wish to undo a bearing, safely scroll right down to the History palette. There you'll be able to click back through history states. make certain you attend light-weightroom Effects Presets and choose Light Grain.
8. BE SELECTIVE once victimization APPLY LEVELS
Adjustment Layers have the feature of being in the middle of a Layer Mask. this could be useful once activity components of the tweak. By merely choosing the comb tool and continue painting over tweaked components with black. you'll be able to conjointly use the command Cmd/Ctrl+I to create the Layer Mask black, then paint with white to reveal the tweak.
ReplyDeleteHi,
Your article is very informative and has a lot of information. I really like your effort, keep posting.
Instant Clipping Path Services | Get Clipping Path Services In 30 Minutes.